

You can find stylish personalized doormats ranging from $13 to $42, but if you’re really into personalizing your home decor, a simple DIY doormat lets you showcase your personality before anyone even steps inside. No wonder making your own doormat is trending this fall!
With just a few supplies — like a blank coir mat and acrylic paint — and a little patience, you can design a one-of-a-kind welcome mat that’s fun, durable, and completely your style. Let’s get started.
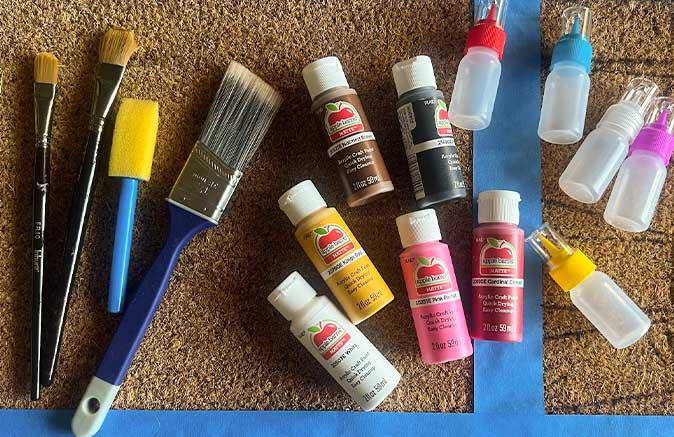
What you’ll need:
- Blank coir welcome mat ($8.53)
- Acrylic paint ($6.47)
- Squeeze bottles ($3.12)
- Sealant ($13.38)
- Paint brushes or sponge brushes ($1.82)
- Shapie ($1.97)
- Painter's tape or masking tape
- Ruler or tape measure ($.82)
Instructions
1. Choose your inspiration and design
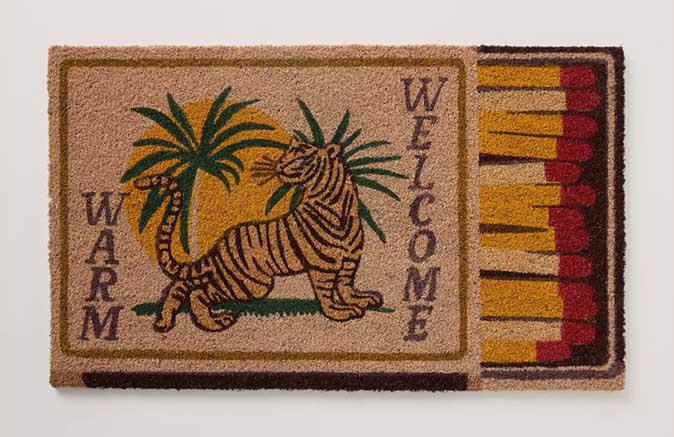
I recommend starting out by sketching out your design on the computer or on a piece of paper to make sure your color palette works together. For my first mat, I was really inspired by the above matchbox-style design from Anthropologie.
2. Map your design on the blank mat
I used tape and hand-made stencils to do this. If you have a printer handy, I recommend printing out your letters and shapes — I didn’t, so I made my own stencils with some cardboard I had around.
Once you’ve laid out your stencils and tape, take your permanent marker and carefully outline your shapes. Note that black marker can be a bit difficult to cover up, so write as lightly as you can while still being able to see it.
If you want to cut your mat, use a white marker or paint pen on the rubber side to mark where you’ll do so. You can use a boxcutter or sharp shears to cut it into your desired shape.
3. Fill your squeeze bottles
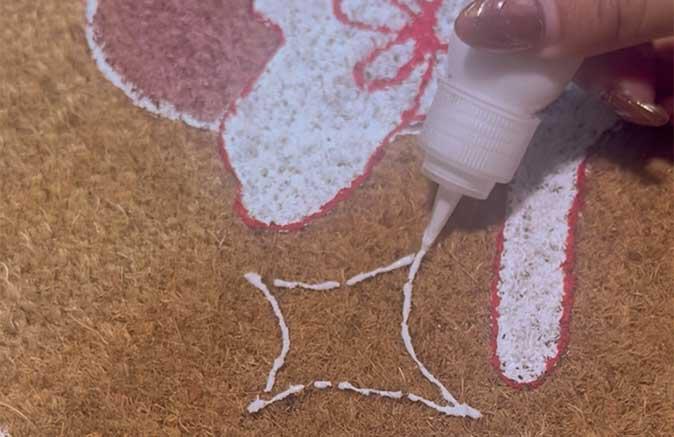
This step is optional, but highly, highly recommended. The squeeze bottle will help you deliver a more consistent amount of paint and get super-crisp outlines. My biggest worry (or critique of some online DIY examples) was how patchy and blurred the edges could look. The squeeze bottles made this project way easier, and the finish was much more professional and legible.
4. Start painting
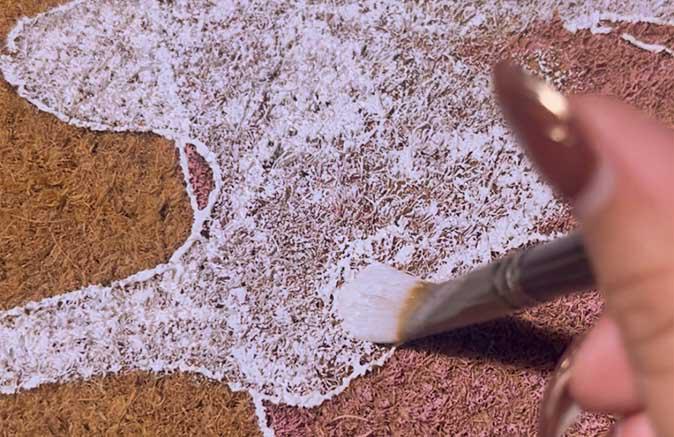
Keep in mind that you will not be able to brush the paint over the coir material — instead, you’re going to stipple it in. After outlining the shape with the squeeze bottle, I took a flat paint brush and carefully brushed it toward the inside of the shape, then stippled out the excess. Once the outline was stippled, I used the squeeze bottle to add paint to any spots that needed coverage and blended that out.
This is the most time-consuming part, but depending on your color choice or design, it doesn’t necessarily mean it’ll take too long. In my design, I wanted the white rabbit and the sparkles to really pop, so I gave them about four or five coats. Other elements of my design (the red match tips and the brown line work) only required one pass. Acrylic paint dries quickly, so it will hardly require any wait time between coats.
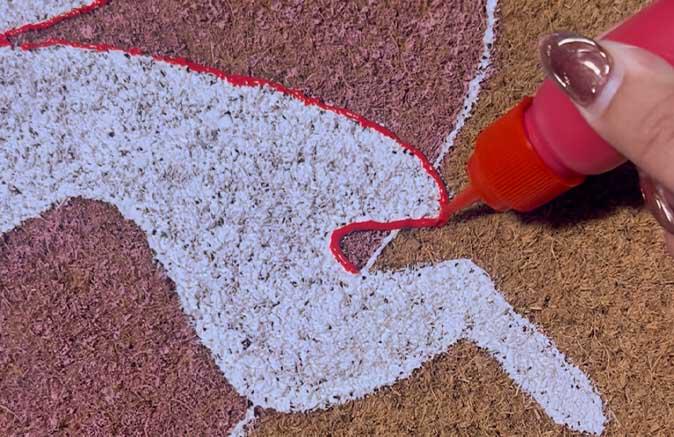
After I filled in my shapes, I took my squeeze bottle and outlined the shape again. This is optional, but I really like how clean the edges turned out.
5. Let it dry and seal your work
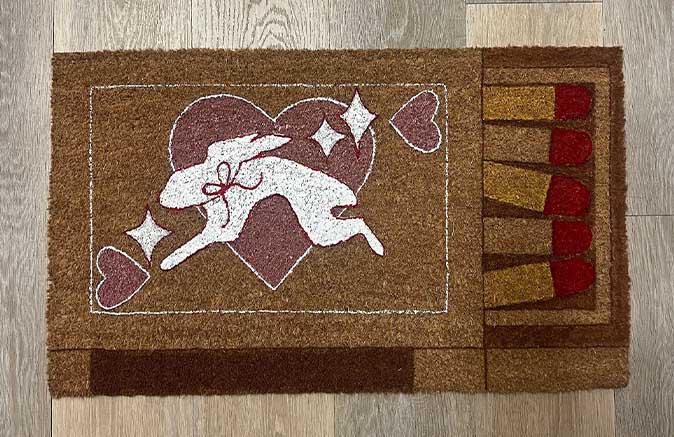
All that’s left to do is let your mat dry for a few hours (I let mine dry overnight), use a clear outdoor sealant to lock in and protect your design, then set it up and enjoy. Congrats, you’ve made an $8 blank mat look like a million bucks!
Made a bit of a mess while making your doormat? Check Walmart's sustainable cleaning products for a gentle clean up!
You May Also Like

Is Walmart+ Worth It? A Breakdown of Membership Perks
June 10, 2026
Walmart Gas Savings: How to Use Your Walmart+ Membership Discount at Walmart Gas Stations
December 15, 2025
Baby, It’s Cold Outside: Winter Essentials for New Parents
December 8, 2025
DIY Drinkware for the Holidays: Anthropologie-Inspired Icon Glasses You Can Make in an Afternoon
December 5, 2025
Sign up for daily deals.
Get personalized inspiration and exclusive deals from your favorite brands straight to your inbox.
By subscribing, you consent to the Savings.com Terms of Service & Privacy Policy
